AIDL学习之路(一)
1. 简介
AIDL全称为(Android Interface Definition Language),由此可以看出这应当是一种定义接口 的语言
2. 具体场景
客户端与服务端进行通信时,需要定义双方都认可的接口 ,AIDL这是用来完成这件工作的工具
AIDL主要应用于IPC,即进程间通信
2.1. 你是否真的需要AIDL
首先,如果并不需要实现IPC,可以直接通过继承Binder类实现client-sever间的通信
其次,如果的确需要实现IPC,但是无需处理多线程,那么应该通过Messager实现,因为Messager能够保证信息是串行 的(其实内部也是通过AIDL实现的)
综上,真正需要使用到AIDL的场景是IPC 和并发处理多个请求 并存
3. 使用步骤
创建.aidl后缀名的文件,定义需要用到的接口
实现定义的接口
将接口暴露给客户端使用
3.1. 创建.aidl文件,定义接口
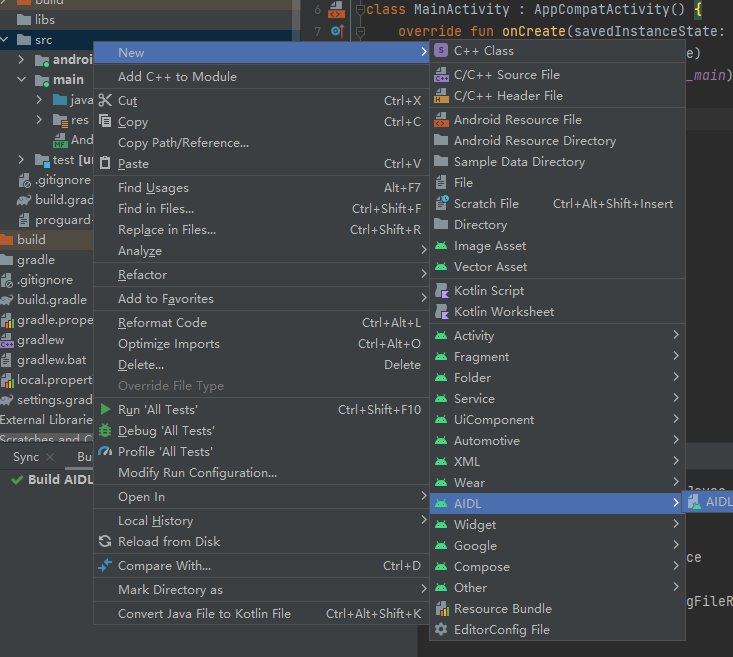
使用AS新建一个空项目,在当前模块的src目录下直接创建一个AIDL文件
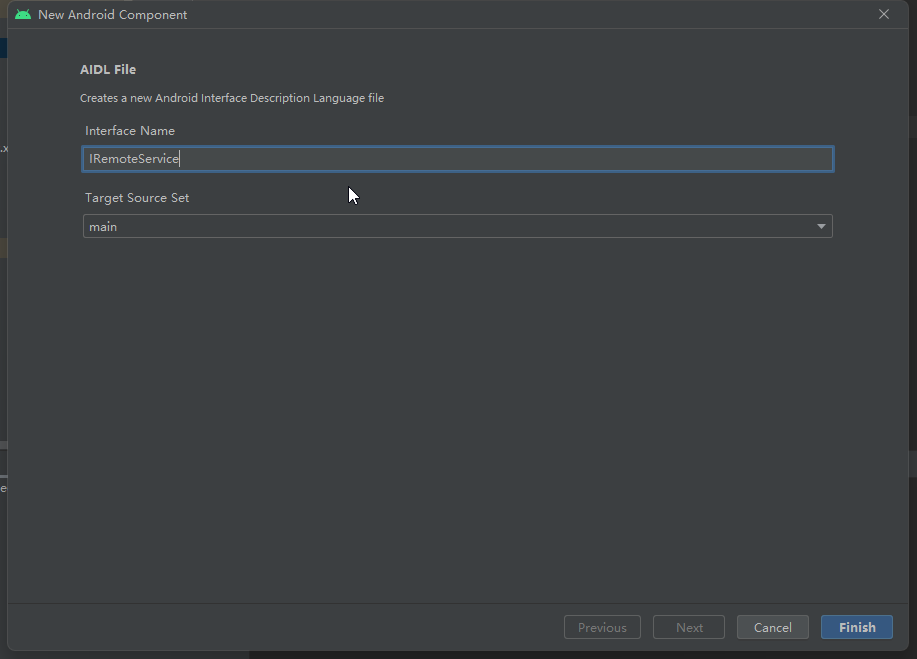
然后重命名为IRemoteService,因为这是一个接口
然后点击Finish完成创建
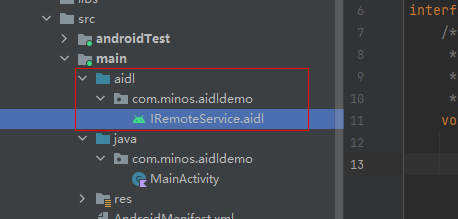
现在项目结构中多了一个aidl目录,下面有一级和java包下包名一样的目录,里面正好就是刚刚创建的aidl文件
以下为默认的aidl模板,我们来定义自己的
1 2 3 4 5 6 7 8 9 10 11 12 13 package com.minos.aidldemo;interface IRemoteService { void basicTypes (int anInt, long aLong, boolean aBoolean, float aFloat, double aDouble, String aString) ;}
在此之前,需要先了解一下AIDL中支持的基础类型
3.1.1. 支持类型
所有的基本类型(如int、float等)
String
CharSequence
List
Map
其中,对于List,Map这种复合类型 的要求是其中的元素类型必须为①前面的支持类型 ,或者是②其他的AIDL接口类型 ,或者是③已经声明的Parcelable类型
List -> ArrayList(实例) [支持指定泛型]
Map -> HashMap(实例) [不支持指定泛型]
知道了AIDL可以支持的类型,接下来我们开始定义自己的接口
首先,我们需要定义一个要用到的数据类型,这是需要在进程进行传递的数据类型
1
2
3
4
5
6
7
8
9
10
11
12
13
14
15
16
17
18
19
20
21
22
23
24
25
26
public class Msg { private String msg; private int pid; public Msg (String msg, int pid) { this .msg = msg; this .pid = pid; } public String getMsg () { return msg; } public void setMsg (String msg) { this .msg = msg; } public int getPid () { return pid; } public void setPid (int pid) { this .pid = pid; } }
这里直接定义了一个常见的Bean类
但是,如果需要这个数据对象能够在进程间进行传递,那么还需要这个类实现Parcelable接口
这是Android提供的一种序列化方式
1
2
3
4
5
6
7
8
9
10
11
12
13
14
15
16
17
18
19
20
21
22
23
24
25
26
27
28
29
30
31
32
33
34
35
36
37
38
39
40
41
42
43
44
45
46
47
48
49
50
51
52
53
54
55
56
57
58
import android.os.Parcel;import android.os.Parcelable;public class Msg implements Parcelable { private String msg; private int pid; public Msg (String msg, int pid) { this .msg = msg; this .pid = pid; } public String getMsg () { return msg; } public void setMsg (String msg) { this .msg = msg; } public int getPid () { return pid; } public void setPid (int pid) { this .pid = pid; } @Override public int describeContents () { return 0 ; } @Override public void writeToParcel (Parcel parcel, int i) { parcel.writeString(this .msg); parcel.writeInt(this .pid); } protected Msg (Parcel in) { this .msg = in.readString(); this .pid = in.readInt(); } public static final Parcelable.Creator<Msg> CREATOR = new Parcelable .Creator<Msg>() { @Override public Msg createFromParcel (Parcel source) { return new Msg (source); } @Override public Msg[] newArray(int size) { return new Msg [size]; } }; }
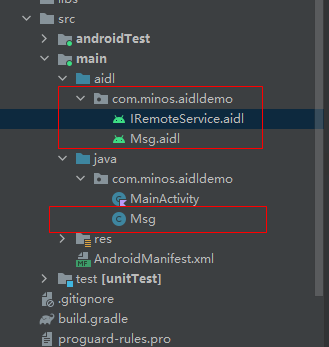
把数据对象的结构定义完成后,还需要为这个新定义的数据类型设置一个同名的AIDL文件
1
2
3
package com.minos.aidldemo;parcelable Msg;
这个文件只声明了刚刚的类型,但是最终并不会参与编译
由于IRemoteService会用到这个类型,因此还需要import导入一下这个类型
尽管在同一个包下,也依然需要写import
1 2 3 4 5 6 7 8 9 10 11 12 13 package com.minos.aidldemo;import com.minos.aidldemo.Msg; interface IRemoteService { Msg getResponse () ; }
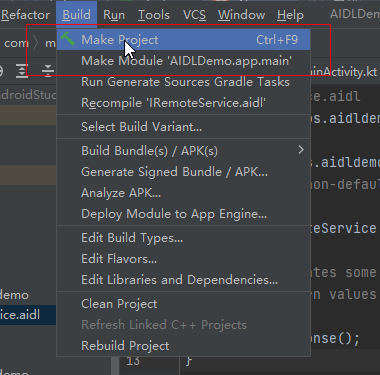
至此,完成AIDL文件的编写工作,开始make对应module
接下来,SDK会为我们生成对应的Java文件
对应module下build的生成文件中可以找到
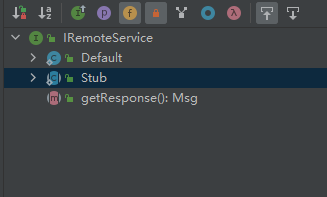
大概看一下结构
这里系统生成了IRemoteService.java这个文件
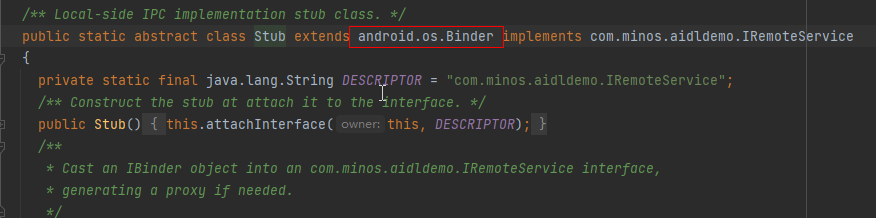
可以看到,里面有一个Stub类
这是一个静态抽象类,并且继承了Binder类,并且实现了IRemoteService接口
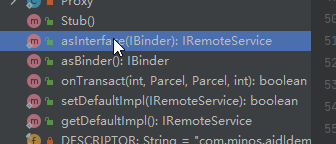
asInterface()方法接收一个Binder类型参数,并且将其转化为当前的接口类型返回,即IRemoteService
3.2. 实现定义的接口
1
2
3
4
5
6
7
8
val mBinder = object : IRemoteService.Stub() { override fun getResponse () return Msg( "msg from service at ${Thread.currentThread().name} \ntid is ${Thread.currentThread().id} \nmain thread id is ${mainLooper.thread.id} " , myPid() ) } }
实现需要用到的接口,即之前定义的,消息中会有线程的信息和进程id
3.3. 将接口暴露给客户端使用
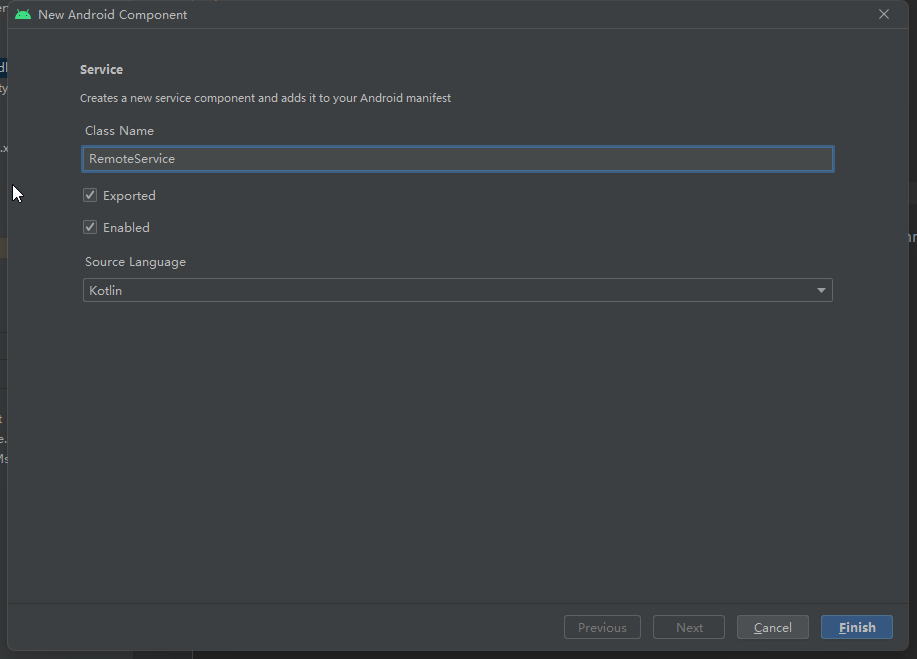
接下来创建一个服务,叫RemoteService
随后在onBind()中返回之前实现的接口
1
2
3
4
5
6
7
8
9
10
11
12
val mBinder = object : IRemoteService.Stub() { override fun getResponse () return Msg( "msg from service at ${Thread.currentThread().name} \ntid is ${Thread.currentThread().id} \nmain thread id is ${mainLooper.thread.id} " , Process.myPid() ) } } override fun onBind (intent: Intent ) return mBinder }
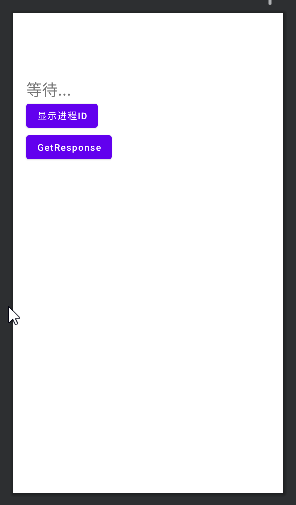
然后编写Activity模仿一下客户端
1
2
3
4
5
6
7
8
9
10
11
12
13
14
15
16
17
18
19
20
21
22
23
24
25
26
27
28
29
30
31
32
33
34
35
36
37
38
<?xml version="1.0" encoding="utf-8" ?> <androidx.constraintlayout.widget.ConstraintLayout xmlns:android ="http://schemas.android.com/apk/res/android" xmlns:app ="http://schemas.android.com/apk/res-auto" xmlns:tools ="http://schemas.android.com/tools" android:layout_width ="match_parent" android:layout_height ="match_parent" tools:context =".MainActivity" > <TextView android:id ="@+id/textView" android:layout_width ="wrap_content" android:layout_height ="wrap_content" android:layout_marginStart ="20dp" android:layout_marginTop ="100dp" android:text ="等待..." android:textSize ="24sp" app:layout_constraintStart_toStartOf ="parent" app:layout_constraintTop_toTopOf ="parent" /> <Button android:id ="@+id/button" android:layout_width ="wrap_content" android:layout_height ="wrap_content" android:text ="显示进程ID" app:layout_constraintStart_toStartOf ="@+id/textView" app:layout_constraintTop_toBottomOf ="@+id/textView" /> <Button android:id ="@+id/button2" android:layout_width ="wrap_content" android:layout_height ="wrap_content" android:capitalize ="sentences" android:text ="GetResponse" android:textAllCaps ="false" app:layout_constraintStart_toStartOf ="@+id/button" app:layout_constraintTop_toBottomOf ="@+id/button" /> </androidx.constraintlayout.widget.ConstraintLayout >
然后,编写一下业务
1
2
3
4
5
6
7
8
9
10
11
12
13
14
15
16
17
18
19
20
21
22
23
24
25
26
27
28
29
30
31
32
33
34
35
36
37
38
39
40
41
42
43
44
45
46
47
48
49
50
51
52
53
54
55
56
57
58
59
60
61
62
63
64
65
66
67
68
69
70
package com.minos.aidldemoimport android.annotation .SuppressLintimport android.content.ComponentNameimport android.content.Intentimport android.content.ServiceConnectionimport android.os.Bundleimport android.os.IBinderimport android.os.Process.myPidimport android.util.Logimport android.widget.Buttonimport android.widget.TextViewimport androidx.appcompat.app.AppCompatActivityclass MainActivity : AppCompatActivity () { private var mRemoteService: IRemoteService? = null private var mBind = false private lateinit var mPidText: TextView private lateinit var mBtnShowPid: Button private lateinit var mBtnGetResponse: Button private val mConnection: ServiceConnection = object : ServiceConnection { override fun onServiceConnected (name: ComponentName , service: IBinder ) mRemoteService = IRemoteService.Stub.asInterface(service) mBind = true } override fun onServiceDisconnected (name: ComponentName ) mRemoteService = null mBind = false } } @SuppressLint("SetTextI18n" ) override fun onCreate (savedInstanceState: Bundle ?) super .onCreate(savedInstanceState) setContentView(R.layout.activity_main) mPidText = findViewById(R.id.textView) mPidText.text = "the client pid is ${myPid()} " mBtnShowPid = findViewById(R.id.button) mBtnShowPid.setOnClickListener { if (mBind) { Log.i("RemoteServiceMsg" , "the service pid is ${mRemoteService?.response?.pid} " ) } } mBtnGetResponse = findViewById(R.id.button2) mBtnGetResponse.setOnClickListener { if (mBind) { Log.i("RemoteServiceMsg" , "${mRemoteService?.response?.msg} " ) } } } override fun onStart () super .onStart() val intent = Intent(this , RemoteService::class .java) bindService(intent, mConnection, BIND_AUTO_CREATE) } override fun onStop () super .onStop() unbindService(mConnection) mBind = false } }
mRemoteService = IRemoteService.Stub.asInterface(service)这一句是关键所在,客户端的操作主要是利用该接口的引用执行方法的调用
如果是非跨进程 的情况下,这里可以直接使用强制类型转换
接下来,再到清单文件中修改注册条件
1 2 3 4 5 6 7 8 9 10 11 12 13 14 15 <service android:name =".RemoteService" android:process =":remote" <!--指定运行到另一进程-- > android:enabled="true" android:exported="true" /> <activity android:name =".MainActivity" android:exported ="true" > <intent-filter > <action android:name ="android.intent.action.MAIN" /> <category android:name ="android.intent.category.LAUNCHER" /> </intent-filter > </activity >
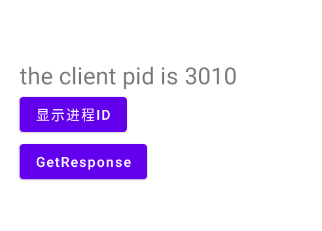
现在Activity扮演客户端,而Service扮演另一进程的服务端
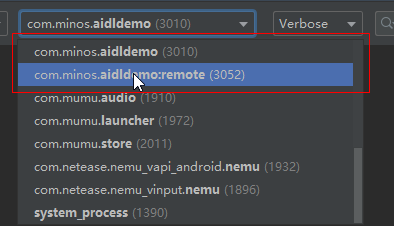
接下来运行项目
这边是我们的两个进程,3010是Activity所在的进程,而3052是Service所在进程
点击一下“显示进程ID”按钮,这是另一进程中Service返回的消息
接着,再点击”GetResponse“
如果非跨进程通信,一定为主线程 ,跨进程的时候处理的线程便无法预测了